This recipe walks through adding a KYI badge next to a token in your UI — the way an exchange or wallet shows “this issuer is verified” for a listed asset. It needs the Public API key for the lookup; the badge image itself is public.

Key concepts

How it works

The badge is a claim, not a check. Gate it on the live record: show it only when the lookup confirms verification, so a revoked asset never keeps a stale badge.

Steps

1

Look up the asset

For each listed token, call the asset lookup with its chain and address:
2

Check the verification flags

A KYI-verified asset has business_details.business_verified: true and verified: true on each authority. 404 means not verified — show nothing.
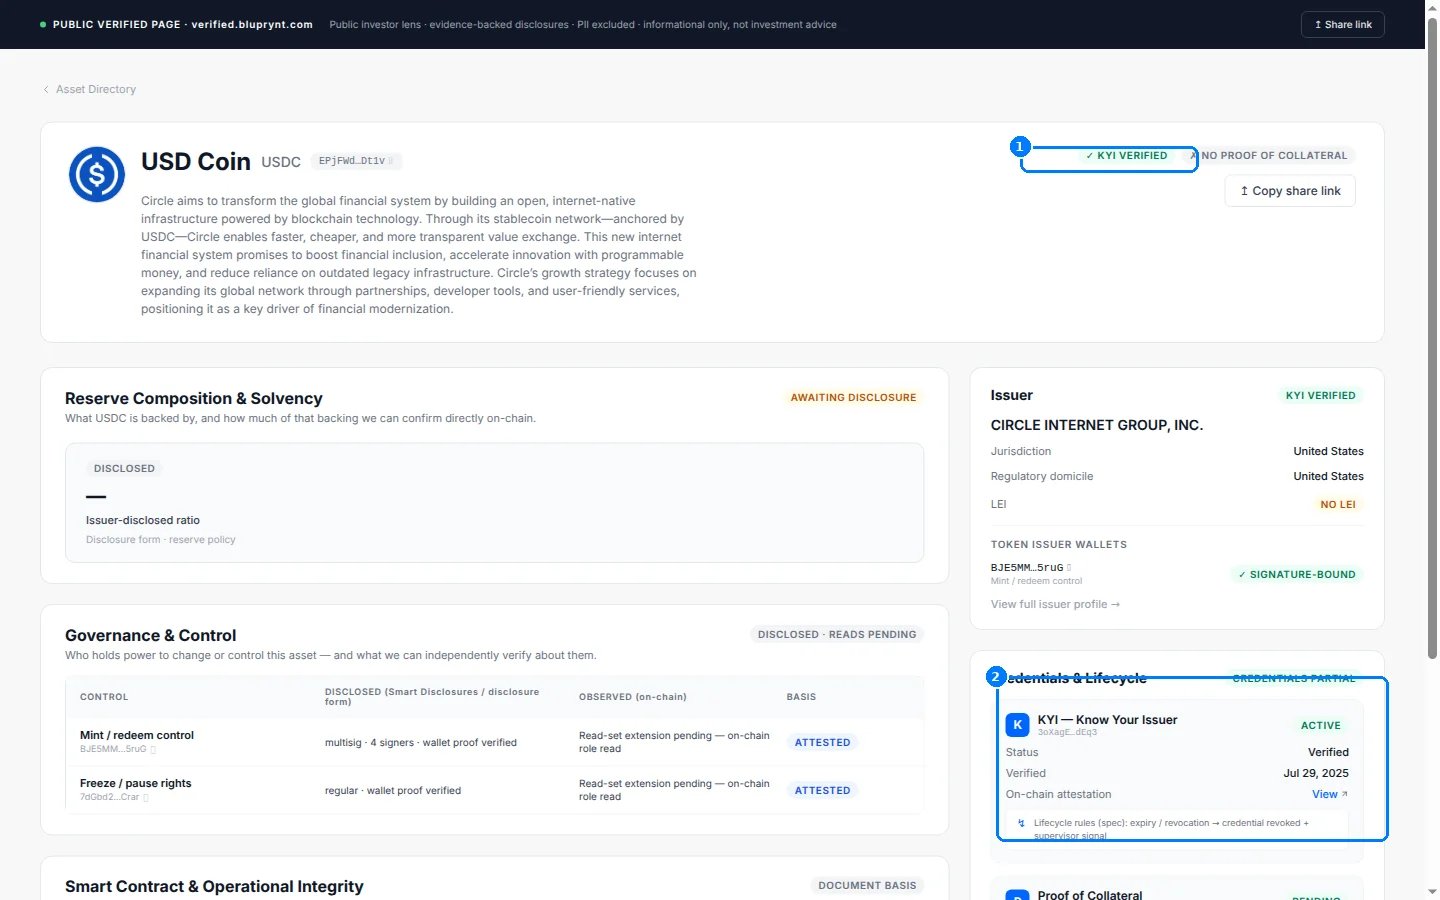
USD Coin verified page showing KYI VERIFIED status and the credential card

The verified page the badge links to — the KYI VERIFIED status (1) and the credential record behind it (2).

3

Render the badge

Use asset_url as the link and the badges endpoint as the image:
4

Refresh on a schedule

Re-run the lookup when you refresh listing data. Verification can be revoked — a cached badge becomes a false claim.

Worked example

TypeScript — server-side, per listed token
Template

Troubleshooting

FAQ

business_verified is the headline KYI state. For a stricter display, require every authority to be verified too — the worked example does both.
You can, but linking to asset_url is the point — it lets your users verify the claim instead of trusting the image. The image alone proves nothing.